Wednesday, 14 May 2014

A bit of Italy!

Hey there everyone, today I'll be teaching you how to make pasta carbonara one of my favourite Italian dishes. Now there are two ways to make this pasta there is the way using cream out of a container which is the easier version and the other way were you make your own from scratch, I'll be teaching you the latter which is the traditional version and in my opinion the much better tasting version, especially when you perfect it. You might have a few bombs the first time as it can be a little tricky to get the mixture completely right but you'll be having mouth watering pasta soon.

What you'll need: 4 eggs, parmesan cheese, pasta or spaghetti or you choice (the recipe works with both), pancetta (bacon bits),

The recipe:
Firstly start cooking your pasta al dente, or thoroughly cooked however you prefer it, and while that's cooking we'll start to make our cream, whisk about 4 eggs for about 500g of pasta, put salt and pepper into the mix and start shredding parmesan cheese into your mix and after you've done that grab your bacon and put it into a small frying pan and cook it for approx 5 mins or until it is slightly crispy.
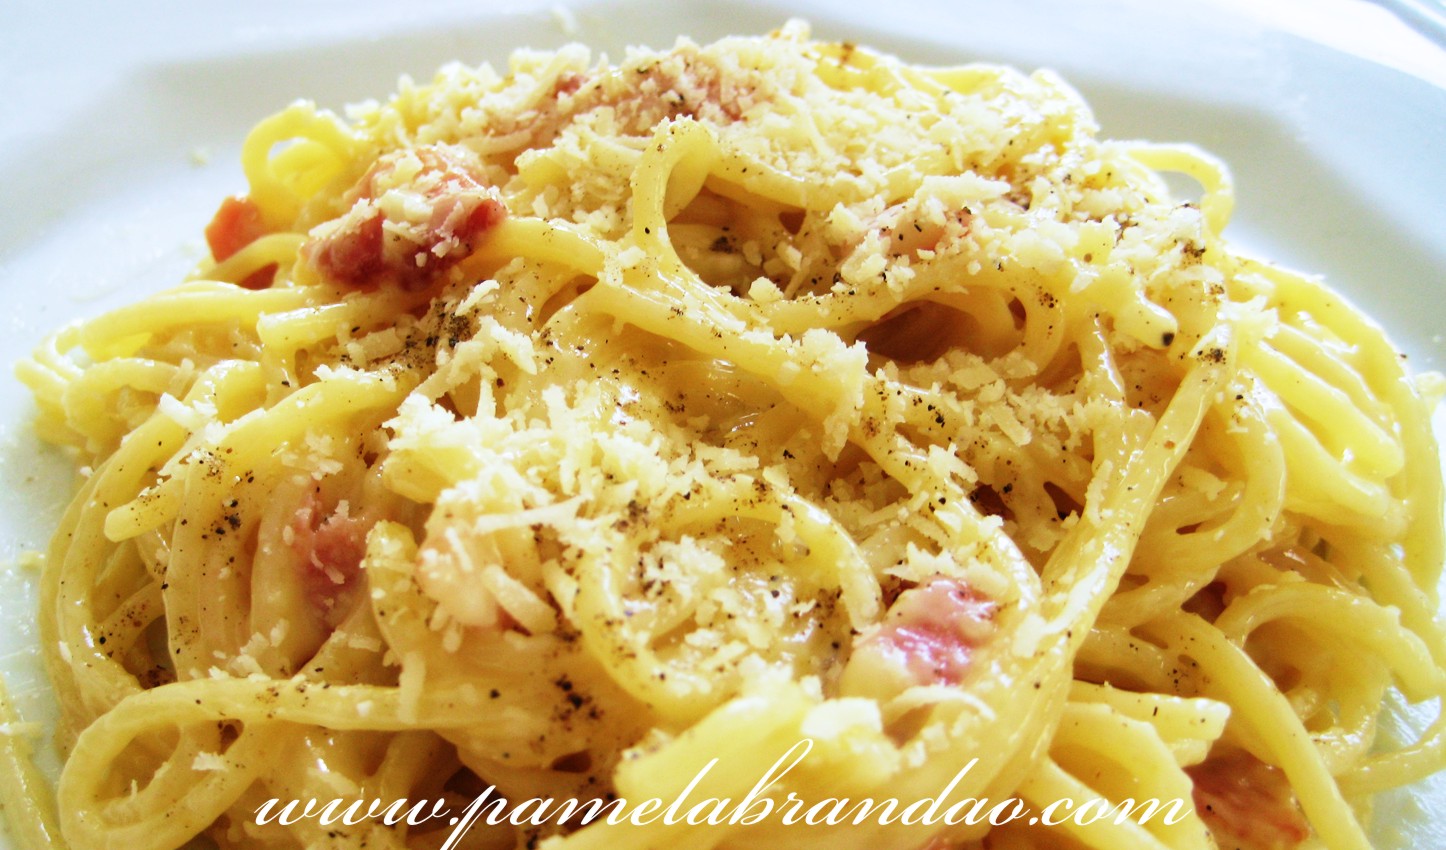
When your pasta is cooked strain all the water into the sink and immediately chuck your pasta back into your cooking pot and put it back on the stove on the lowest possible heat and throw in your cream and mix it around the pasta for about two minutes until you see the egg has been half cooked or a bit more and throw in your bacon top with extra parmesan if you're a fatty like me and enjoy your meal.

Classic Tomato and Herb Gnocchi


So it's getting to that time in the evening where you're feeling like something extravagant for dinner but you don't have a few hours to prepare a meal or the energy to! This is one of my own recipes, and it is quick and easy to make! You can have the entire meal cooked within 20 minutes! It's a simple and delicious italian dish which everyone will enjoy.

What you will need:
- Half an onion
- A clove of garlic
- Canned tomato and basil
- Paul Newman's tomato and basil sauce
- Cheese (tasty, feta & mozzarella)
- Mixed italian dried herbs
- And of course, Potato Gnocchi

You are more than welcome to make your own potato gnocchi balls from scratch, but for time's sake i'll cut down a few hours of preparation to only 5 minutes cooking time.

First things first: Dice your 1/2 onion and fry until golden brown, then dice your garlic and fry with the onion for a few minutes

Next combine 1 full can of canned tomato and basil and 1 full jar Paul Newman's tomato and basil sauce. Leave this on a low heat.

Boil a pot of water and tip in about half a packet of potato gnocchi. The trick to the perfect gnocchi is leaving it to boil for the perfect amount of time. As soon as the gnocchi rises and floats to the top of the water, grab a strainer and drain the water.

Next, add the gnocchi to the pot of tomato base, add about half a cup of grated tasty cheese and about ¼ of a cup of mozzarella cheese. The add dried herbs. Leave on a low heat and stir for about 5 minutes so the gnocchi can soak up the tomato and herb flavours.

Turn off the heat, add some feta and serve! Easy peasy!

I personally think this gnocchi goes perfectly with some Panini!

Afternoon treats

When I was younger my favourite thing was to come home to was the smell of freshly baked biscuits. So fresh that you bite into them and they are still warm in the centre. The best was when they were chocolate chip - my absolute favourite. They smell delicious, and when they are fresh from the oven all of the chocolate is still soft and beautiful! I thought today I would share with you my favourite recipe for chocolate chip biscuits.


You will need:

  • 1 1/2 cups of plain flour
  • 1/4 teaspoon bicarbonate soda
  • 125 grams of butter
  • 1/2 cups of white sugar
  • 1 egg
  • 1 teaspoon vanilla essence
  • Milk chocolate chips
  • White chocolate chips


Step 1:
Preheat your over to 180 degrees Celsius.

Step 2:
Sift the flour and bicarb soda into a bowl and set aside

Step 3:
Cream butter and sugars together. You will know when to stop when the mixture is light and fluffy.

Step 4:
Add the egg and the vanilla essence to the mixture, and beat well.

Step 5:
Stir in the flour and soda you sifted earlier, and then add the chocolate bits - see tips at the end to find out the amount of chocolate chips I use.

Step 6:
Put baking paper on an over tray, and place even amounts of biscuit mix onto the tray. Don't roll the mixture into balls, it tastes better if it isn't heavily handled, it just looks a bit more rustic!

Step 7:
Bake in the oven for 12-15 minutes, until golden on top

Step 8:
Cool on a wire rack and then eat!!

Tips

  • Make sure you take the butter out of the fridge at least 45 minutes before you start to bake, it makes the butter a lot easier to work with. 
  • Sometimes if the mixture is taking too long to creme, then add the egg anyway, it will make the mixture lighter, and can sometimes help it to creme. However do not give up easily! Only do this if you feel as though it has been in the mixture for ages and no change is occurring. 
  • You can use a the mixer rather then stirring in the flour - I suggest you do, it's so much better at ensuring all the flour is mixed in. But make sure you stir it in roughly first, otherwise when you turn the mixer on the flour will go everywhere! 
  • Usually when I make this I use Nestle Choc Bits, and use both white and milk chocolate, but you can use just one type, or dark chocolate if you wish as well. Usually I just pour chocolate in until it looks like enough. This is 1/2-3/4 of each packet (I think the packets I usually use are 250g each). This can be changed to taste though, I know some recipes say to only use a total of 100g of chocolate.
  • If you want to be extra fancy you can put leftover chocolate chips on the top of the biscuits, this looks really good


Tuesday, 13 May 2014

Fancy Pants Techniques - Part 2

Welcome to Part 2 of the dessert techniques series! Today I will be covering a technique that is bound to impress: tempering chocolate. If you've cooked with chocolate before, you may have noticed that once you have cooked with it, it can become dull, soft, and even have a white "bloom" sort of appearance on the surface. This happens because when in a solid form, the cocoa butter crystals in the chocolate are suspended. However when it is heated, this suspension is broken and the crystals surface, causing the "bloom" appearance when it is cooled. So whilst it still tastes nice, it doesn't look the best!
The idea of tempering the chocolate is to return the chocolate to it's suspended state and ensure that when you use it, e.g. for chocolate moulds or cake decorating, it maintains that glossy finish and crisp snap. Here's the how-to:

How to Temper Chocolate

What you will need:

  • Required chocolate for your recipe
  • A cooking thermometer
  • A saucepan of simmering water 
  • A bowl that sits on top of your saucepan but not fully in it 
  • A spatula or spoon
Method:
  1. Chop the chocolate in to pieces of the same size, as small as you can get them. Alternatively, you can roughly chop the chocolate and blitz it in a food processor in order to ensure uniformity.
  2. Place 2/3 of the chocolate in the bowl and sit it in the saucepan over the top if the water, but not touching it (as contact with the water will make your chocolate too hot and the elements will separate).
  3. Melt the chocolate to 50 degrees Celsius, stirring occasionally.
  4. Remove the chocolate from the heat and add the remaining 1/3 of chocolate, stirring until the chocolate is consistent and reaches 32 degrees Celsius.
Test: spread your chocolate in a thin layer on to a plate. If it sets quickly and has a shiny, smooth finish, you have successfully tempered your chocolate!

For a demonstration video, click here

Source: http://www.bbc.co.uk/food/techniques/how_to_temper_chocolate
http://www.cadburykitchen.com.au/kitchen-tips/view/tempering-chocolate/13/

Posted by Clare Mannion.


Fancy Pants Techniques Part 1

Hello fellow foodies,

So I would like to teach you how to use a few fancy-pants pastry chef techniques, and today is Part One in the two-part series! These techniques can be slightly more advanced and are for those of you who are looking to up the ante on your baked goods, pastries, or desserts in general. The techniques I will be laying out include how to temper chocolate, which is basically making sure your chocolate looks nice and shiny and snaps crisply after you have cooked with it, and how to quenelle something such as cream in a slightly more sophisticated fashion than the good old dollop. Both of these techniques are great for the presentation of your dishes, so listen up if you're eager to impress! Today I will be covering how to quenelle.

How to Quenelle 

What you'll need:
  • Two spoons of the same size - go for a deeper spoon if you can, as it makes creating a rounder shape much easier! The spoons should be at a temperature warm enough to manipulate the ingredient, but not so warm that they melt it.
  • The ingredient you wish to make in to a quenelle shape, e.g. ice cream, whipped/double cream, or mousse. The ingredient should be at room temperature - i.e. Not so firm that it can't be shaped, but not so close to a liquid that it can't hold it's shape. 
Steps:
  1. Hold a spoon in both hands and scoop a reasonable amount of the ingredient into one of your spoons. Carefully scoop underneath the ingredient with the second spoon, transferring the contents between spoons. 
  2. Transfer the ingredient back to the original spoon using the same movement. You will notice that this begins to create a smooth, rounded surface. 
  3. Keep repeating this process, passing the ingredient between the spoons until you have the smooth, oval shape that you desire.
This can be a bit tricky, so if you need help see this video for further demonstration.

Source: http://www.finecooking.com/item/13273/making-quenelles

Posted by Clare Mannion.


Sunday, 11 May 2014

The Perfect Breakfast

Every Sunday morning my family will wake up and my Dad will make us all breakfast before I have to go to work. Every Sunday we have the same thing - French Toast. There is not many things I like more then French Toast, all of the egg in a beautiful piece of bread - delicious!


French toast is really simple to make. All you will need is
  • Sliced bread
  • Milk
  • Eggs
  • Salt and Pepper
Use an egg for each person you're cooking for, and about 1/4 of a cup of milk per egg.

Step 1:
Whisk the eggs and milk together and put in some ground salt and pepper.

Step 2:
Put the desired amount of bread into a large dish (I usually use a casserole dish) and pour the egg mixture over the bread. Ensure all the bread is covered in egg. Turn the bread over after half the mixture is poured to get the desired coverage.

Step 3:
Cook in a fry pan until golden.


French Toast isn't really difficult to make, but there are a few secrets that will make all the difference to your breakfast.

Secret 1 - the bread
Using just your normal bread from the supermarket will be ok, but it won't be as good as it could be. Using sourdough or a heavier bread like this will make the meal so much better. Make sure you don't slice it too thick though - slices about 1-1.5cm thick will be perfect. The bread doesn't need to be fresh, it could be left over from lunch a few days before. Just make sure it isn't too far gone or it won't be very nice. 

Secret 2 - soaking the bread
The longer you leave the bread to soak the nicer it will be. This is particularly important if you use a bread like sourdough, where the egg needs longer to make it to the whole way through the bread. My advice, make the mixture and pour it over the bread, and then go make a coffee or have a shower or something. After you're ready come back and cook it, and it will be delicious.


Mother's Day 2014


To celebrate the last few hours of Mother's Day 2014 I have decided to share my mum's baked chilli pumpkin salad. Now this is one of my favourite salads of all time and it is my mum's creation. This salad goes with almost any meal, is extremely healthy, tasty and simple to make! - what more could you ask for!?

Better yet, you can customise the ingredients to include whatever you fancy!

These are the ingredients that I love together in this salad:
- Chilli olive oil
- Butternut pumpkin
- Canned Chickpeas
- Sunflower seeds
- Croutons
- Feta cheese
- Garden salad leaves

The recipe goes like this:
1. It is as simple as cutting the pumpkin into squares (to whichever size you please), popping these squares onto a baking tray, glazing the pumpkin with the chilli olive oil and baking the pumpkin in the oven (180 degrees fan forced) for 40 minutes.
2. Whilst the pumpkin is cooking, add all other ingredients into a salad bowl (don't forget to drain the chickpeas first!). - It is entirely up to you for the ratios of each ingredient you want to use. - Once all ingredients are in the salad bowl, lightly toss around to mix the ingredients in. Once the pumpkin is cooked, leave to cool a little and then add the pumpkin pieces to the salad. Toss lightly, and you are ready to serve!!
Serving suggestion: For me personally, I love this salad with baked chicken and couscous!

This is such a simple recipe it will have all the guests talking or become a family favourite in no time. I hope everyone has had a wonderful Mother's Day!

Wednesday, 7 May 2014

Easy and Fast Creamy Chicken Curry


There is no secret to the wonders of curry all it takes
is the careful and precise application of this wonderful spice at the right time. Today we'll show you how to create and easy creamy curry.
Firstly your ingredients will be: white/brown rice, onions, chopped garlic, chicken breast, whatever curry powders you can get a hold of (for me the more the better),Full cream, olive oil, salt, pepper and whatever other spices you want to throw in, there's no limit when it comes to cooking.

The first step would be to start cooking your rice 2-1 ratio with water to rice with salt and a table spoon of olive oil and chuck it in the microwave for about 12 minutes. While this is cooking you can get started on your curry sauce. Firstly chop up an half an onion and then cut up approx. 500 g of chicken breast into small pieces. Then start cooking your onions in a pan with a little bit of garlic and olive oil until it begins to brown then throw in the chicken and stir it around until it is cooked the whole way through. At this point you can bombard your chicken with curry i personally use three different kinds of curry powder and pepper. After the curry has been mixed in you can pour in approx 300 ml of cream and swirl it around and let it simmer until it takes on a golden hue. By now your rice should be finished so then you serve them together and only then do you salt the dish, salting it any earlier in the chicken makes it unnoticed due to the powerful taste of the curry.
Total time to complete about 30 minutes.

Preparing for Winter


It's coming up to the time of the year when the sun sets a little earlier, it's harder to get out of bed in the mornings, we wake up with frost on our grass and the air is crisp, pure and not to mention freezing! Thats right, winter is approaching! - 23 days away to be precise and we can already feel it!

Who doesn't love a hot bowl of soup to warm our insides when this time of year comes around! I have you sorted with the BEST pumpkin soup recipe, I promise once you try it you'll love it! If you are anything like me, every winter you devour different variations of this winter miracle food but your version just isn't like the restaurants! I have found that 2 key miracles to a perfect pumpkin soup.

  1. Roast your pumpkins beforehand, it just gives it that rustic, homey taste of your mum's cooking.  
  2. Don't be shy with the cream! A full of flavour pumpkin soup must have that perfect creamy smooth taste!
This is the recipe I have found that warms my taste buds up after a chilly winter's day:
  •             2kg butternut pumpkin, deseeded, peeled, coarsely chopped
  •             
2 tablespoons finely chopped fresh rosemary
  •             
80ml (1/3 cup) extra virgin olive oil
  •             
Salt & freshly ground black pepper
  •             
2 large brown onions, halved, coarsely chopped
  •             
4 garlic cloves, crushed
  •             
2 tablespoons ground coriander
  •             
2 large fresh red chillies, deseeded, finely chopped
  •             
2L (8 cups) vegetable stock
  •             Extra virgin olive oil (optional), extra, to serve
  •             250mls of thickened cream
Three easy steps to the perfect pumpkin soup:
  1. Preheat oven to 220°C. Combine the pumpkin, rosemary and half the oil in a large roasting pan. Season with salt and pepper. Bake in preheated oven for 30 minutes or until tender.
  2. Meanwhile, heat the remaining oil in a large saucepan over medium heat. Add the onion, garlic, coriander and chilli, and cook, stirring, for 10 minutes or until onion softens. Add the pumpkin mixture and stock and bring to the boil. Reduce heat to low and simmer, covered, stirring occasionally, for 10 minutes or until it reduces slightly. Remove from heat.
  3. Place half the pumpkin mixture in the jug of a blender and blend until smooth. Pour into a clean saucepan. Repeat with the remaining pumpkin mixture. Add 250mls of thickened cream, stir in Taste and season with salt and pepper.
And there you have it, your perfect pumpkin soup! 


Monday, 5 May 2014

Faking It - Recipe Book Review

A favourite recipe book around the home is Faking It by Valli Little, from ABC's delicious. collection. Based on the premise of providing clever shortcuts for the time-poor or multitasking cook, without compromising on the quality of the food or the integrity of the chef, this book is six years old and is an old faithful in the kitchen, providing recipes for dishes that are simple but bound to impress, and suitable for anything from a weeknight dinner to a formal dinner party. 

Whilst Faking It may contain some ingredients and methods that the home cook may shy away from - such as chermoula paste or scrambling eggs using an espresso machine - this recipe book contains a variety of recipes to satisfy both a simple and a more advanced cook. 

It also contains many twists on traditional recipes, such as adding truffle oil to macaroni cheese, or topping cottage pies with gnocchi instead of mashed potato. 

Overall, Faking It by Valli Little is a handy cookbook to have around for cooks of all skill levels, and is a valuable addition to your kitchen. 

Faking It is available for purchase here.

Posted by Clare Mannion.

Sunday, 4 May 2014

Macaroni Cheese

Macaroni cheese is a quick and easy meal to make, and it's delicious! The cheese sauce used in this recipe can be used for anything - like lasagne, or nachos. The recipe for the cheese sauce I use can be found in Julie Goodwin's book, Our Family Table, an excellent cookbook that you can purchase here. Here is a really easy recipe for how to make Macaroni Cheese.

You will need:

  • Pasta
  • 50g Butter
  • 1/4 cup plain flour
  • 3 1/2 cups milk
  • Grated Cheese (tasty or cheddar, but you can add blue cheese or another type for taste as well)
  • 1 Tablespoon Dijon Mustard (or add to taste)
  • Salt and Pepper
  • Bacon

Step 1
Melt butter in a saucepan. Once melted, add the flour. Begin to boil the water for the pasta. Preheat the oven on grill at about 220 degrees Celsius. 

Step 2
Once the flour and butter mix is like a dough, add the milk, only a little bit at a time - between about 1/8 and a 1/4 of a cup at a time, and stir until absorbed into the mixture. Repeat this until all the milk is added. Don't forget to stir constantly to ensure the mixture doesn't stick to the bottom of the saucepan. Cook the pasta at the same time as adding the milk. 

Step 3
When all the milk has been added keep stirring until the mixture begins to boil.

Step 4
Put in the mustard, and season with salt and pepper. Remembering to continue to stir. Add cheese to taste.

Step 5
Once the pasta is cooked, strain and put into a casserole dish. Pour the cheese sauce over the top, ensuring that it goes over all the pasta.

Step 6
Add some more cheese on top (parmesan is always a good option, as well as tasty or cheddar cheese). Cut up the bacon into small pieces and place on top

Step 7
Place in the oven and cook for about 15 minutes or until the bacon looks cooked. 

Serves 4.

Tips
  • I usually use an entire box of Barilla pasta - either tortiglione, or girandole. I rarely actually use macaroni
  • You can add anything to the cheese sauce when you add the cheese, for example onion can be a nice addition
  • Use any cheese, but for the sauce use mostly tasty cheese. If you put blue cheese you have the choice of putting it on top, or in the sauce. I prefer it in the sauce. Putting a mixture of cheese on top is also quite nice. 
  • Perfect if you have leftover ham from Christmas, or another occasion, just use ham instead of bacon
  • If cooking for a vegetarian just skip the bacon. 


Happy cooking!


Posted by Lucinda Moore